
Posted on 02, October, 2017
Last Modified on 30, December, 2025
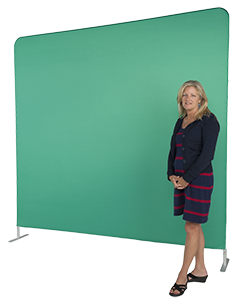
Shop These Products

So you just got a green screen and you're ready to shoot? Whether you're making a commercial, student project, or a high budget film, your final cut will look professional with the correct setup. In this article, we'll explain how to use your green screen to create a realistic scene from placement to post-processing.
While “green screen,” “blue screen,” and “chroma key” are synonymous, any color will work. These colors are used most often because they don’t resemble natural skin tone or hair color, meaning no part of an actor will be edited out.
1. Setting and Set Up

Choosing the location to place your green screen is important. Find a large space that will fit your backdrop like a studio, garage, or even outdoors. Make sure there's room for film equipment like cameras and lights as well. Green screens made with stretch fabric are ideal for shooting in all environments due to a taut surface that will stay smooth, even in windy conditions. Place your chroma key fixture on a flat, stable surface to prevent it from falling over while filming.
If shooting the actor down to their feet, consider using green flooring for full coverage. A drape that matches the color of the screen is enough for an easy chroma-key process.
Next, secure the backdrop. Consider using weights or sandbags to the feet of the frame or on the sides of your green cloth. This will keep the green screen in the perfect position that you can base the rest of your equipment on.
If you need a background setting, you can find entire catalogs of proprietary footage from services like Shutterstock, Video Blocks, and Envato Market. This is almost never offered for free, so consider filming your own background footage if you're on a tight budget.
2. Lighting the Screen
When using a green screen, it's important to use strong lighting to create a solid color on the backdrop. Creating a consistent shade of green is important because it will make processing chroma key effects much easier. Use illumination from the sides and top where they'll be out of the shot. Green screens made with stretch fabric are taut and don't have wrinkles that can cause shadows. If using a DIY cloth, aim to get your surface as smooth as possible using as many clips and fasteners as necessary.
3. Lighting the Subject
Reduce shadows cast by actors by using overhead lighting or have them stand a distance from the screen if you need to use standing lights. Separate your subject from the background, giving them a distance of a few feet. This stops a green edge caused by the actor's shadows, an unintended effect commonly referred to as "color spill". Make sure they're not wearing anything close to bright green or they'll disappear into the background! Alternatively, if using a blue cloth, tick that hue off of your color options for your outfit that day.

Remember to match the lighting on your subject with the lighting in the scene. For example, if your actor is supposed to be on the beach at sunset, use an orange or yellow, front facing light pointed at the subject from the side to create a more true-to-life sunlit effect. Remember to position your lighting to line up realistically with your background footage. If the scene's setting is indoors, overhead white lighting is more appropriate.
4. Position Your Actors and Cameras
Direct your subject to stand away from the screen, but far enough back that their feet will be surrounded by green flooring. The best position is near the horizontal center, giving the actor enough room to move without a part of their body leaving the color backdrop.
Place your camera so that the green backdrop covers the shot in the viewfinder, while making sure lights and sandbags are out of sight. If you're single-angle filming, you only need to get the lighting right once. If you're going to give your subject more than one angle, make sure that screen is a consistent green color in each frame.
5. Film a Test Shot
It's time to find out how your shot will look! Once you've adjusted your lights to perfection, start recording a test shot. Bring this to your video editing software and use your chroma-keying effect to see how it looks with your background footage. If your lighting doesn't match the scene, adjust or switch out your lights. If you notice "color spill" around your subject, have them stand further from the backdrop.
6. Bring Your Footage to the Computer
Once you have your footage, upload to your choice of video editing software and start creating your scene. Professional editors often use proprietary programs like Adobe Premiere, Sony Vegas, Final Cut Pro, and Corel VideoStudio. All of these make using a green screen easy, but come at the cost of a license. For filmmakers with a limited budget, free software is available like Wax, iMovie, VSDC Free Video Editor and Open Broadcaster Software (OBS).
Adding a chroma key effect will be different depending on what editing software you use. In simple editors, it can be as easy as loading your green screen footage in the foreground, applying the keying filter, and featuring your stock footage in the background. If you have trouble finding how to add this effect, Google the program's name and "green screen" and you'll find lots of documentation and instructional videos made for people in the same position.
The filter is the most important part, it will determine how much of the green backdrop is replaced. This is where having a consistent background color is important — the more uniform this shade is, the easier it will be for the editor to distinguish the backdrop from the actor. If it's not perfect, you can tweak the settings until all of the green is replaced and no part of the subject has disappeared.
7. Finalize
Once you've applied your filter, make sure that the completed effect meets your standards. After a long day of working on a video, it helps to take a break and look at it later or have another person make some edits. Fix any errors you find by tweaking the settings, or in the case of a major flaw (subject lighting doesn't match background lighting), consider a re-shoot. Render your video when you're happy with the result and you're on your way to creating dynamic content in virtually “any” setting!